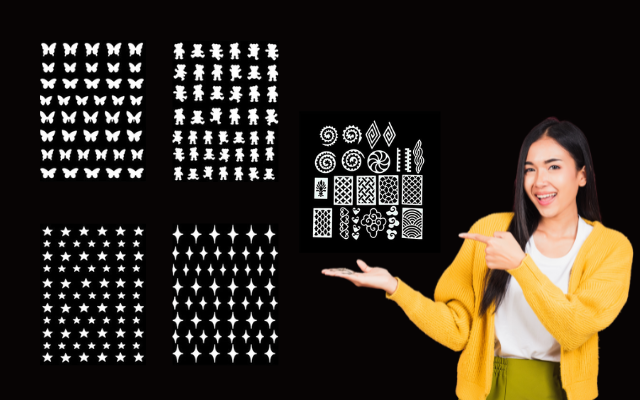
Just like you, I’m a huge fan of nail vinyls. However, instead of buying them, did you know we can easily make them ourselves? This not only allows for a fun and creative DIY project but also helps in cutting down costs. With a little bit of time and some basic materials, you can craft personalized nail vinyl stencils that cater to your unique style and preferences. Whether you’re aiming for intricate patterns or simple designs, creating your own nail vinyls opens up a world of endless possibilities and adds a special touch to your nail art repertoire.
Table of Contents
ToggleDIY Nail Vinyl Stencils

Creating your own nail vinyl stencils is a fun and creative way to achieve unique nail designs. With some basic supplies and a bit of patience, you can make custom stencils that allow for intricate patterns and styles. Here’s how to do it:
Step 1: Gather Your Materials
Firstly, you will need a few supplies:
- Adhesive vinyl sheets: These are the base of your stencils.
- Craft knife or a small pair of scissors: For cutting out designs.
- A cutting mat: To protect your surface.
- A pencil and paper: To sketch your designs.
- Tweezers: For handling small pieces of vinyl.
Step 2: Design Your Stencil
Start by sketching your designs on paper. Keep the designs simple at first, as more intricate patterns can be more challenging to cut out and apply. Once you’re happy with the design, place your paper over the adhesive vinyl sheet and trace the design onto it.
Step 3: Cut Out the Design
Using your craft knife or scissors, carefully cut out the design from the vinyl sheet. Make sure your cuts are clean and precise for the best results. For intricate designs, take your time and work slowly.
Step 4: Apply the Stencil to Your Nail
Peel off the vinyl stencil and use tweezers to place it on your nail. Ensure it is flat and smooth against the nail surface to prevent polish from seeping underneath.
Step 5: Paint Over the Stencil
Apply nail polish over the stencil. You can use a single color or multiple colors for a gradient or multicolored effect. Wait for a moment to let the polish set slightly.
Step 6: Remove the Stencil
While the nail polish is still slightly wet, carefully remove the stencil using tweezers. This helps in creating sharp lines and prevents smudging.
Step 7: Seal the Design
Once the polish is completely dry, apply a clear top coat to seal the design. This step is crucial as it protects your artwork and gives a glossy finish.
If there are any mistakes or excess polish, use a small brush dipped in nail polish remover to clean up the edges.
DIY a nail sticker with the gel polish:
20 Nail Vinyls Ideas You Can Try
- Geometric Patterns: Triangles, squares, and other geometric shapes for a modern look.
- Floral Designs: Delicate flowers, leaves, and vines for a feminine touch.
- Animal Prints: Leopard spots, zebra stripes, or tiger patterns for a wild appearance.
- Abstract Art: Random swirls, splashes, and strokes for an artistic vibe.
- Lace Patterns: Elegant lace designs for a sophisticated and classic look.
- Mandala Art: Intricate mandala patterns for a bohemian style.
- Galaxy Theme: Stars, planets, and cosmic designs for a space-inspired look.
- Polka Dots: Simple yet playful polka dots of varying sizes.
- Chevron Stripes: Zigzag patterns for a dynamic and trendy appearance.
- Nautical Themes: Anchors, waves, and maritime symbols for a sea-inspired design.
- Festive Themes: Snowflakes, pumpkins, or hearts for seasonal nail art.
- Graffiti Art: Bold, street-style graffiti designs for an edgy look.
- Glitter Overlays: Vinyls that create perfect spaces for adding glitter accents.
- Minimalist Lines: Thin, simple lines for a subtle and clean design.
- Butterfly Wings: Delicate butterfly wing patterns for a whimsical look.
- Ombre Effect: Vinyls that help create a seamless ombre nail design.
- Cartoon Characters: Fun and playful cartoon or comic-themed designs.
- Art Deco: Vintage Art Deco patterns for a retro-glam look.
- Optical Illusions: Designs that play tricks on the eye, like 3D cubes or spirals.
- Personalized Text: Custom words or initials for a highly personalized style.
Conclusion
While Nail Vinyls aren’t overly expensive, the DIY aspect of creating them is incredibly enjoyable. What’s even more special is that you’ll end up with unique, one-of-a-kind designs tailored just for you or your clients. This personal touch not only adds value to the nail art but also allows for a level of customization that you can’t find in store-bought products. Engaging in this creative process not only hones your artistic skills but also gives you the freedom to experiment with different styles, ensuring that your nail designs always stand out with their originality and personal flair.

